Stairs Design
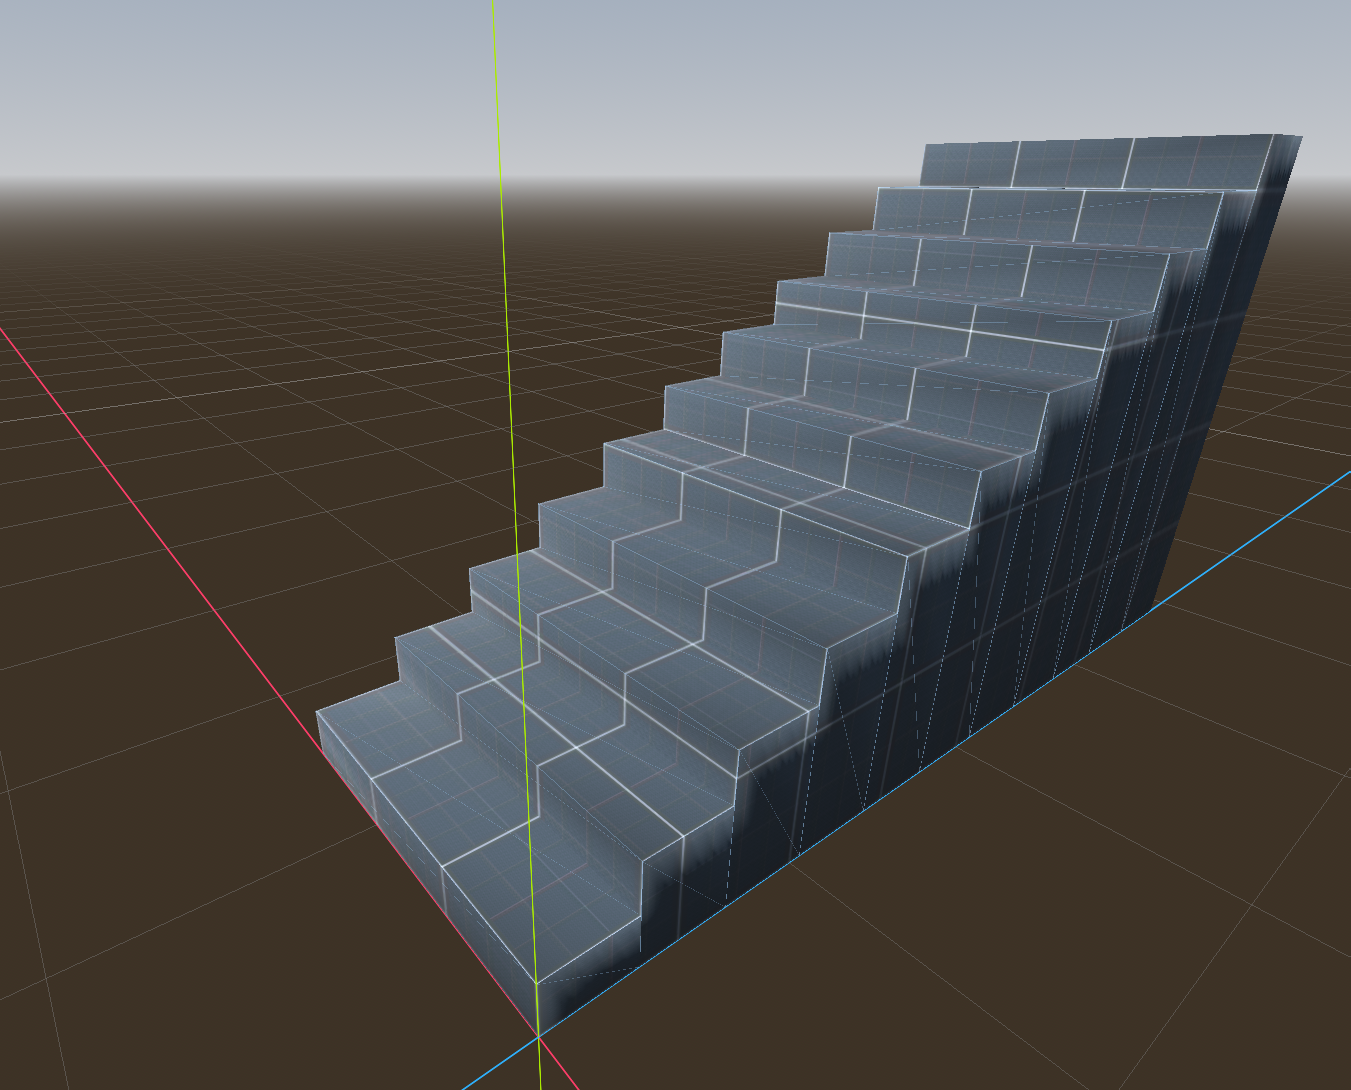
This project has a script for automatically generating stairs. This will generate a set of stairs based on parameters provided by the user as a @tool which allows for modifications in the editor to be applied directly to the object.
Please see stairs.gd script for api details.
Configurable properties:
- num_step - Number of steps in staircase.
- step_depth - Depth of each step.
- step_height - Height of each step.
- step_width - Width of each step.
- include_side_faces - Include side faces for stairs.
- include_back_face - Include square for back of staircase.
- include_bottom_face - Include bottom face of staircase.
- texture - Texture to apply to staircase material.
Whenever a property is updated, a new stair mesh and material will be generated based on the properties provided. The Stairs._build_mesh function generates a mesh using a SurfaceTool object.
Mesh
The stairs mesh is composed of a set of vertices, edges, and faces. The SurfaceTool in godot allows you to define a face by providing a set of three vertices. Depending on the order of vertices, clockwise or counterclockwise, determines the direction and visibility of each face. See Back-face culling for details. In Godot, the rendering mode is determined by the Cull Mode property of a given material.
For each step within the staircase, the mesh will have 4 faces defined, one in the front of the step, one on the top of the step, and one face on each side.
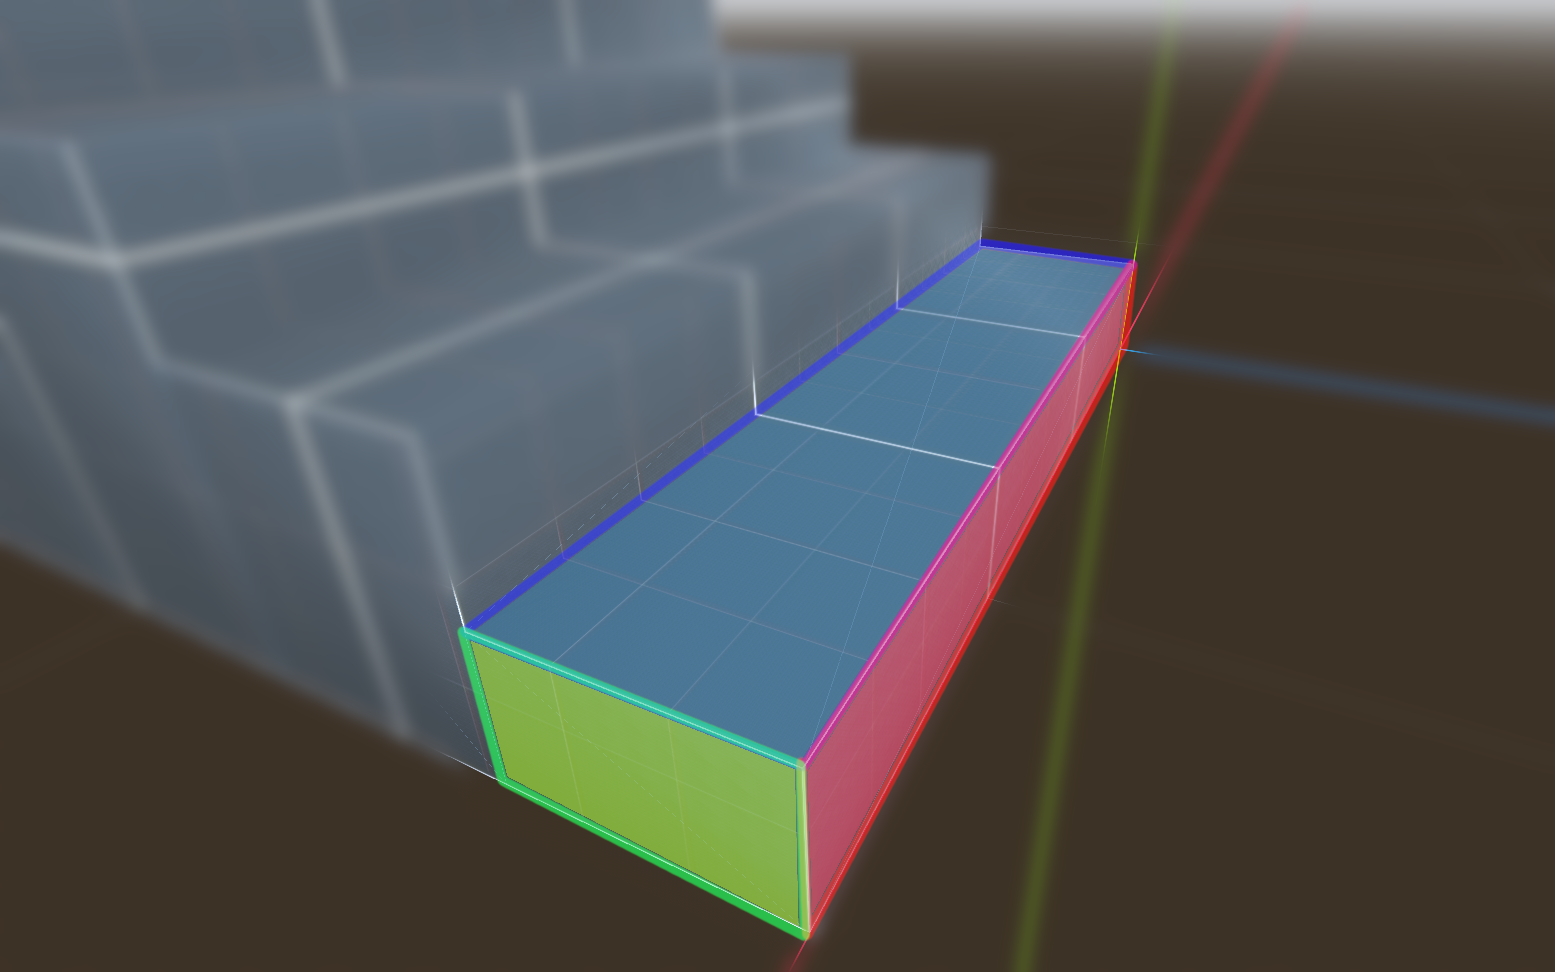
Each face is defined as two triangles facing outwards. Each subsequent step in the staircase starts where the previous step ends and has sides that reach all the way down to the bottom.
The mis-aligned vertices on the sides between steps does cause some UV and shading artifacts which can be seen more clearly when the face is un-textured. However, if a texture is applied, the effect is less noticeable.
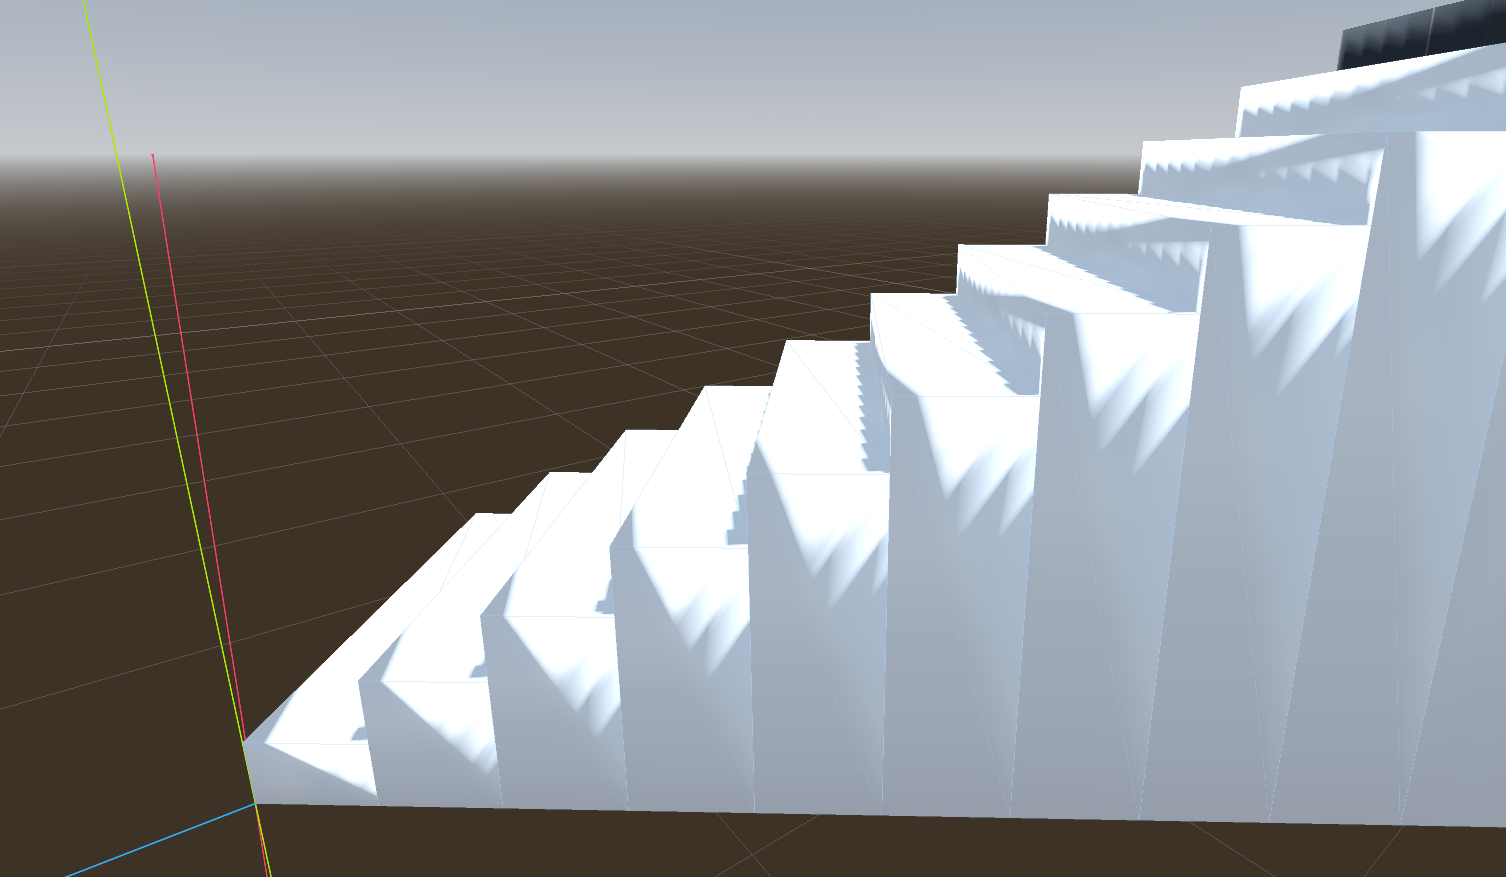
This mesh also needs normals for each vertex which can be generated using the SurfaceTool.generate_normals to ensure proper lighting interactions.
Additionally the mesh has a UV mapping for each vertex based on the position and which plane they are on. This UV mapping allows for the texture to appear mapped on the surface of the stairs. That way they will tile smoothly between steps.
- All the faces on the top are mapped using the coordinates in the XZ plane.
- All the faces on the sides are mapped using the coordinates in the ZY plane.
- All the faces on the front are mapped using the coordinates in the XY plane.
Node Setup
The node setup for the stairs object is configured as a Node3D as the root node with the stairs.gd script attached. The stairs script will generate three children nodes with types MeshInstance3D, StaticBody3D, and CollisionObject3D to define the visual component of the stairs, and the shape of the stairs in the physics world. Whenever a parameter is updated, the mesh for the mesh instance and collision body will both be updated.
+Stairs (MeshInstance + Stairs.gd)
|--+ MeshInstance3D
|--+ StaticBody (StaticBody3D)
   |-- CollisionBody3D